本部分說明
以下為專案管理員主題:設定、成員、表單類型、儀表板與整合。此處變更會影響整個專案。
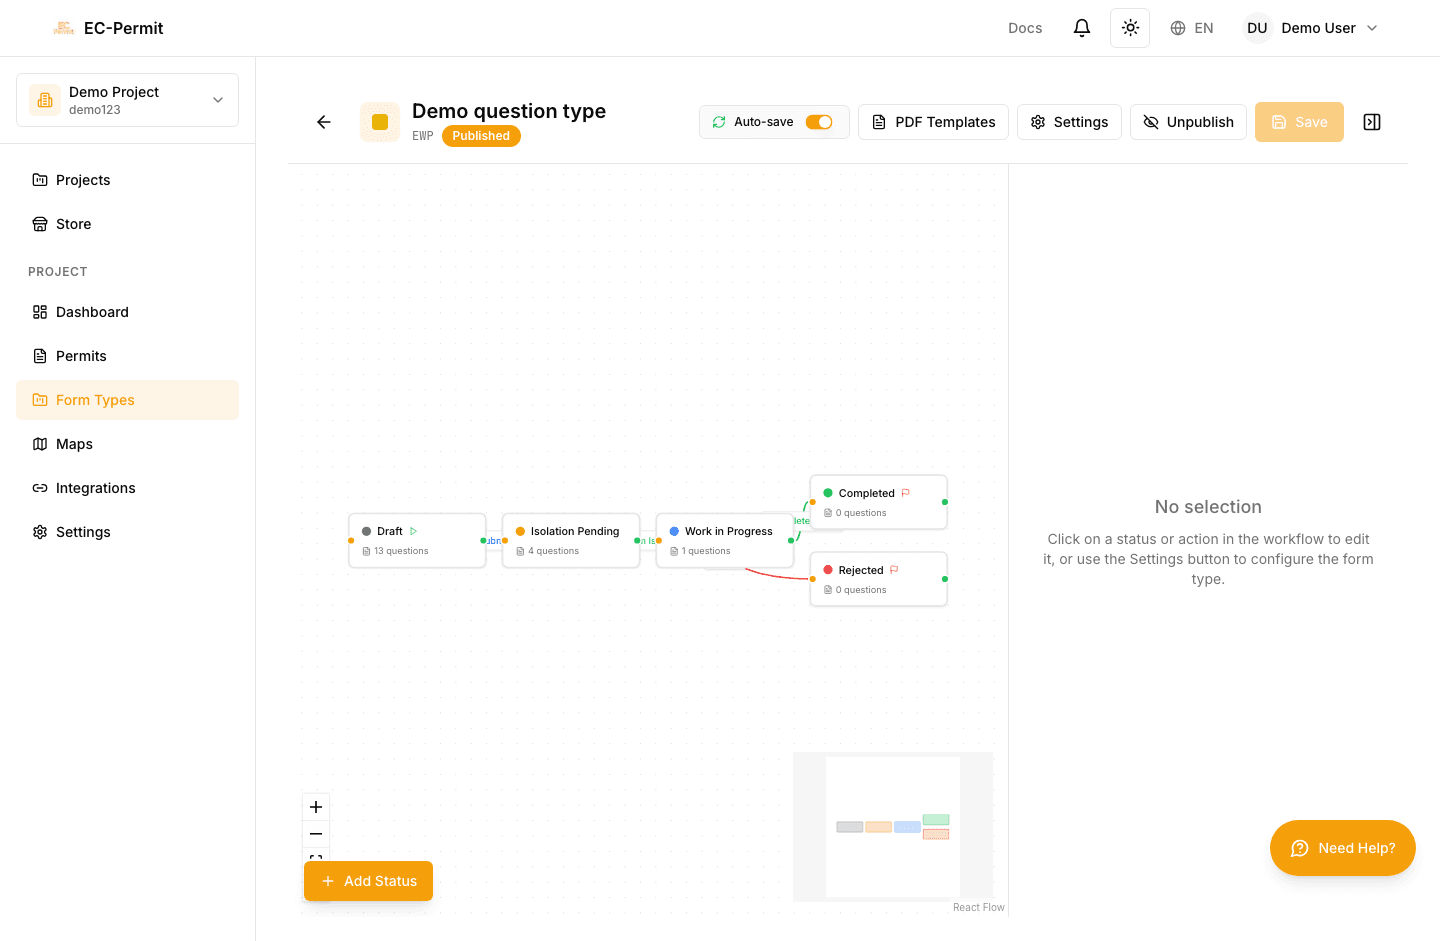
工作流程編輯器
工作流程編輯器
使用工作流程編輯器直觀地設計審批工作流程。定義狀態、操作以及表單在審核流程中的移動方式。
了解工作流程

工作流程由兩個主要元素組成:
狀態
表單可能處於的狀態(例如,草稿、待批准、已批准)
行動
在狀態之間移動表單的轉換(例如,提交、批准、拒絕)
視覺化編輯器

工作流程編輯器使用由 React Flow 提供支援的視覺化畫布:
拖曳狀態
將它們放置在畫布上
連線狀態
透過從一個拖曳到另一個來創建動作
點擊元素
配置它們的屬性
縮放和平移
導航大型工作流程
建立狀態
點擊“新增狀態”
畫布上出現一個新的狀態節點
輸入狀態名稱
例如,“草案”、“待審核”、“已批准”
選擇顏色
顏色可幫助使用者快速識別表單狀態
設定狀態類型
初始(起點)、正常或最終(結束狀態)
每個工作流程至少需要一個
最初的
狀態(新表格開始的位置)和一
最終的
狀態(表格結束處)。
創建動作

從一種狀態拖曳到另一種狀態
在狀態之間建立連接線
為動作命名
例如,“提交”、“批准”、“拒絕”、“返回更改”
配置操作屬性
設定權限、所需評論、通知
動作設定

每個動作都可以配置:
允許的角色
哪些角色可以執行此操作
需要評論
強制用戶在執行此操作時添加評論
通知設定
採取此操作時誰會收到通知
按鈕顏色
視覺風格(綠色表示批准,紅色表示拒絕等)
範例工作流程

草稿
→ Submit →
待審核
→ Approve →
等待決賽
→ Approve →
得到正式認可的
兩級審核流程:審核者→最終審核者→已核准
在向使用者宣布之前,請務必透過建立測試表單來測試您的工作流程。驗證表單是否正確流經所有預期路徑。
建立表單類型
問題類型
後續步驟
建議繼續閱讀: